VIEWPORTS
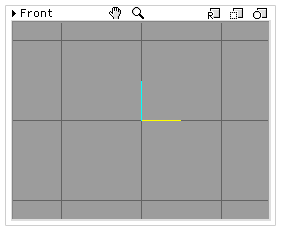
 The Viewports are located at the center of the screen and they are where you view, create and manipulate your models in ShapeShifter 3D. Each Viewport displays the current model in a particular projection. The projections are: 3D, Front, Back, Left, Right, Top and Bottom. The default view of a Viewport displays its grid and its axis. Colored lines at the center of the Viewport identify the axes of a Viewport. Each color represents a different axis: a yellow line represents the X axis, a cyan line represents the Y axis and a magenta line represents the Z axis. All Viewports, except the 3D Viewport, have 2 axes, and any operation performed in these Viewports take place in those 2 axes. The default setting for all Viewports, except the 3D Viewport, is to render the current model in wireframe mode. All settings can be modified in the Viewport Settings (see below).
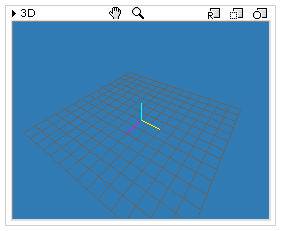
 3D Viewport : The 3D Viewport is different from the other Viewports. It displays the current model in a 3 dimensional environment and let you rotate around the 3 axes to view the model from different angles. Click and drag on the 3D Viewport to rotate the view around the 3 axes. Differently from the other Viewports, you cannot perform any operation by clicking on the 3D Viewport other than rotate the view. The default setting for this Viewport is to render the current model in textured mode.
 VIEWPORT SETTINGS
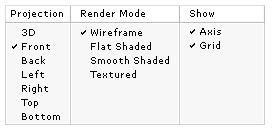
The arrow located at the top left corner of every Viewport is used to expand or collapse the Viewport Settings, where you can switch between different projections, render modes and show or hide that Viewport axis and grid. Click on the arrow to open the Viewport Settings. Click on the open arrow to close it. Projection: The current projection being displayed on that Viewport is identified by a checkmark. Click on a different projection to change to that projection. Render mode: The current render mode being displayed on that Viewport is identified by a checkmark. Click on a different render mode to change to that mode. Show: check to display the Viewport axis and grid. Uncheck to hide them.
![]() Viewport Label:
Viewport Label:
Shows the current projection being displayed on that Viewport.
VIEWPORT TOOLS
Each Viewport has its own set of tolls, located at the top of the Viewport window. The Viewport tools allow you to control how your model appears in the Viewport. These tools do not affect the objects in any way; they only change how the objects are viewed.
![]() Pan:
Pan:
The Pan tool locks the Viewport in pan mode. Only the view moves, not the objects themselves. To pan click anywhere on the Viewport and drag in any direction. You can also activate the Pan tool temporarily by holding the spacebar and clicking on a viewport.
![]() Zoom:
Zoom:
The Zoom locks the Viewport in zoom mode. It is used to magnify or reduce the view in a Viewport. Position the cursor in the Viewport and click and drag to zoom in or zoom out. You can also activate the Zoom tool temporarily by holding the OPT key (ALT on Windows) and clicking on a viewport.
![]() Reset View:
Reset View:
The Reset view tool resets the current Viewport to its original default configuration.
![]() Frame Selected Objects:
Frame Selected Objects:
The Frame Selected Objects tool lets you fit the selected objects in your model inside that Viewport.
![]() Frame All Objects:
Frame All Objects:
The Frame All Objects tool lets you fit all the objects in your model inside that Viewport.