MATERIALS TAB
The Materials Tab gives you access to all the operations you can perform with the materials of your current model. The Materials Tab buttons may be active or dimmed. If the button's function is not available, the button is dimmed. To activate the buttons you must first select a material from the Material list.
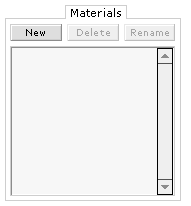
New: Create a new material.
Delete: Delete a selected material.
Rename: Rename a selected material. A dialog box will appear where you can enter the new name of that material.
Material List: Gives you a list of all the materials in your current model.
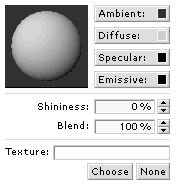
The Material Properties are available when you select a material from the Material list. They contain a window displaying the appearance of the current material, buttons and fields to control its properties, and a place where you can assign a texture to the diffuse channel of the selected material.
Shininess: Lets you change the current value of the shininess property of the selected material.
Blend: Lets you change the current value of the blend property of the selected material.
Texture: Choose a texture to be assigned to the diffuse channel of the selected material. Click the Choose button to select a texture, click the none button to clear the assignment. You must first assign a texture to a material to edit its coordinates in the Texture Coordinate Editor available in the Groups Menu.
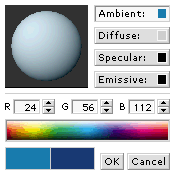
Ambient: Edit the ambient properties of the selected material. Click the button to access the ambient properties (left). The bottom part of the materials tab will change, displaying the ambient color properties. You can select a color specifying its Red, Green and Blue values by clicking the up and down arrows next to the values field, or you can choose a color from the color picker. The two boxes below the color picker display the previous and current colors for that material, letting you compare the changes you've made. Click OK to accept the changes or Cancel to cancel them. Important: you must click the OK button before clicking anywhere outside the ambient material properties for your changes to take effect.
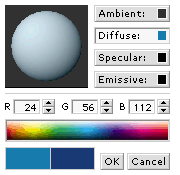
Diffuse: Edit the diffuse properties of the selected material. Click the button to access the diffuse properties (left). The bottom part of the materials tab will change, displaying the diffuse color properties. You can select a color specifying its Red, Green and Blue values by clicking the up and down arrows next to the values field, or you can choose a color from the color picker. The two boxes below the color picker display the previous and current colors for that material, letting you compare the changes you've made. Click OK to accept the changes or Cancel to cancel them. Important: you must click the OK button before clicking anywhere outside the diffuse material properties for your changes to take effect.
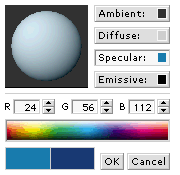
Specular: Edit the specular properties of the selected material. Click the button to access the specular properties (left). The bottom part of the materials tab will change, displaying the specular color properties. You can select a color specifying its Red, Green and Blue values by clicking the up and down arrows next to the values field, or you can choose a color from the color picker. The two boxes below the color picker display the previous and current colors for that material, letting you compare the changes you've made. Click OK to accept the changes or Cancel to cancel them. Important: you must click the OK button before clicking anywhere outside the specular material properties for your changes to take effect.
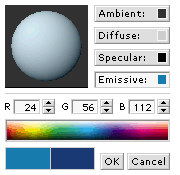
Emissive: Edit the emissive properties of the selected material. Click the button to access the emissive properties (left). The bottom part of the materials tab will change, displaying the emissive color properties. You can select a color specifying its Red, Green and Blue values by clicking the up and down arrows next to the values field, or you can choose a color from the color picker. The two boxes below the color picker display the previous and current colors for that material, letting you compare the changes you've made. Click OK to accept the changes or Cancel to cancel them. Important: you must click the OK button before clicking anywhere outside the emissive material properties for your changes to take effect.